When it comes to refactoring ADF components in JDeveloper, most ADF developers come to know the refactoring features when they rename, move or delete Business Components (BC) objects. Yet fewer know that additional options exist in JDeveloper to refactor object attributes, attribute domain types, bindings, JSF pages and more.
Main Theme
Refactoring ADF BC objects
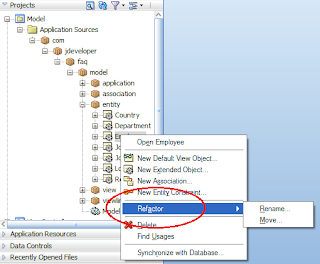
Refactoring ADF BC objects is available through the Rename... and Move... menu selections of the Refactor menu. You can display the Refactor menu when you right-click on the BC component in the Application Navigation window.
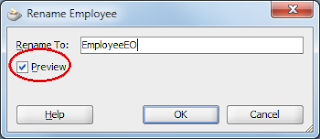
If you choose to rename a component, JDeveloper will present a Rename dialog. In this dialog you can specify the new name for the object and choose to preview the changes that will be generated by the refactoring process.
It is a good idea to preview the changes, when the Preview option is available. When you click Preview in this case, a Rename Log window will open listing all the changes that will be made by the refactoring process.
You can browse through the changes by clicking the Synchronize with Editor button
 This is a toggle button. It will open the applicable source file as you click through the changes in the Log window. When you are done reviewing the changes, click on the Do Refactoring button
 to apply the changes. If you decide for whatever reason not to go ahead with the refactoring, just close the Rename Log window.
Choose Move... from the Refactor menu to move the BC object to another package. This will present a Move dialog, where you can specify the new package name for the object to be moved.
Deleting a BC object is not available under the Refactor menu. It is available as a separate Delete menu option in the same context menu.
When you select Delete to delete a BC object, a Confirm Delete dialog will be presented. If the BC object you are about to delete is used throughout the project, a Show Usages button will be also be available in the Confirm Delete dialog and a Log window will open displaying all of the object's usages.
To view the object's usages on the Confirm Delete dialog itself, click on the Show Usages button.
To individually inspect each object usage, first click No to dismiss the Confirm Delete dialog. Then in the Log window click the Synchronize with Editor toggle button
 and browse through the object's usages. As you browse through the object's usages, the corresponding source file will be opened and you will be positioned exactly where the object is being referenced in the source.
Refactoring ADF BC Object Attributes
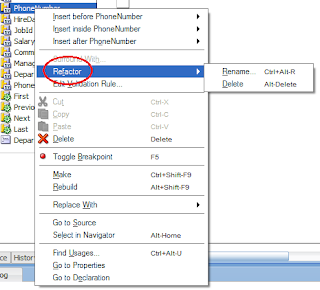
Refactoring ADF BC object attributes allows you to rename, delete and change the domain type of a BC object's attribute. Moving an attribute is not supported. To refactor an attribute, bring-up the object's overview editor by double-clicking on the object in the Application Navigator window and select the Attributes pane. Then right-click on the attribute and select Rename... or Delete from the context menu that is displayed.
In both cases - renaming or deleting the attribute, you can preview the usages - as described earlier before proceeding with the refactoring process. Consider also selecting Find Usages... from the context menu to review the attribute usages without doing any refactoring.
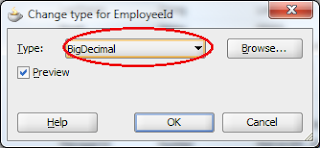
In addition to renaming and deleting an attribute, you can also refactor the attribute domain type by selecting Change Type.. from the context menu. This will display a Change type dialog from where you can select the new domain type for the attribute. You can also choose to preview the changes in the Change type Log window. This window will open when you select Preview and click OK.
Refactoring Data Bindings
You can refactor bound objects in the Data Binding Definition page. To do so, bring up the Page Definition File associated with a JSF page and in the Overview tab right-click on the specific binding that you want to refactor. Then choose Rename... or Delete from the Refactor menu.
Again, before you delete a binding you can verify its usages by clicking the View Usages button in the Delete Safely dialog that is displayed. This will open the Delete Safely Log window where you can review the usages. Click on the Synchronize with Editor toggle button
 to bring up each usage into the source editor.
Refactoring JSF Pages
You can refactor a JSF page by right-clicking on the page in the Application Navigator and selecting Rename..., Move... or Delete from the Refactor menu. JDeveloper will update all references to the page in task flows and in the DataBindings.cpx mappings when renaming or moving the page.
Conclusion
The refactoring options in JDeveloper are quite powerful and can help substantially during the development process. They range from refactoring data components objects, object attributes, attribute domain types, data bindings, JSF pages and files. For more information about refactoring and their limitations I suggest that you check out the Fusion Developer's Guide - referenced below.
Until the next time, keep on JDeveloping!
Reference
Oracle® Fusion Middleware Fusion Developer's Guide for Oracle Application Development Framework 11g Release 1 (11.1.1) Part Number B31974-02
 |  |
